 粉色, Lightroom, 预设, Luts, 女性化, 少女, 情人节, 浪漫, 爱, 肖像, 暖, 蓝绿色, 粉彩, 甜的, 时尚
编号 :14-pink-lightroom-presets-and-luts-7J4FFH
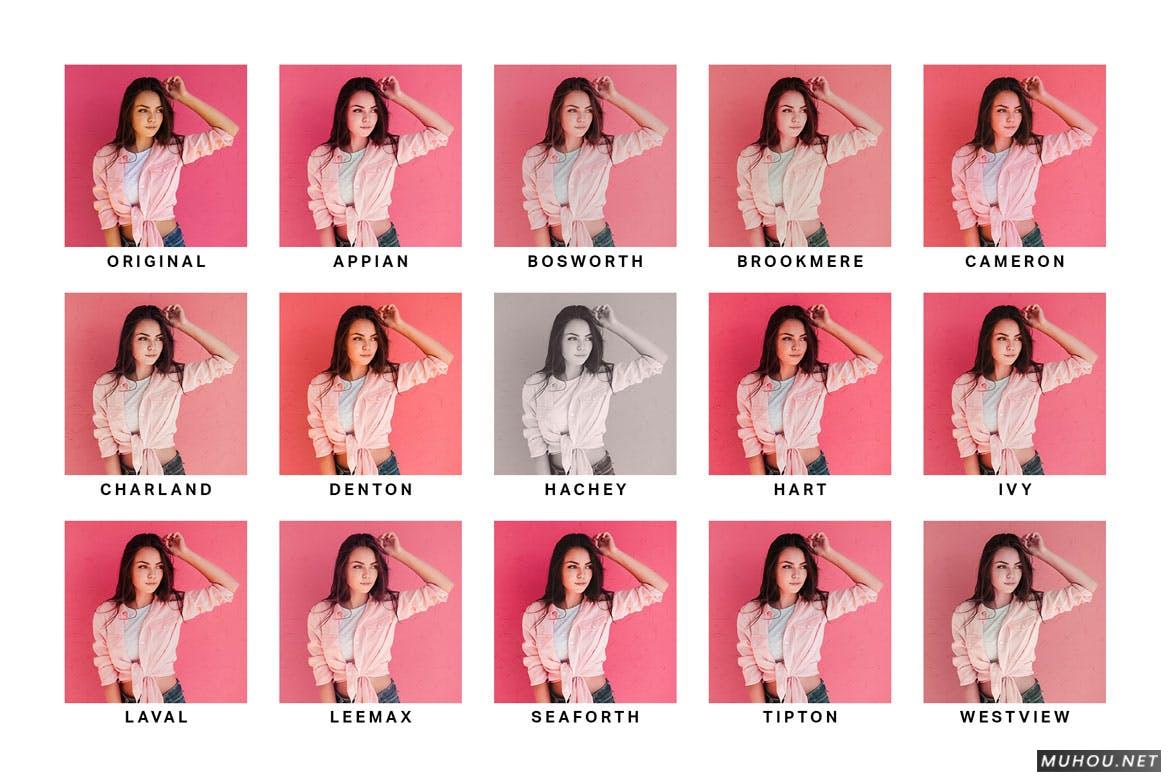
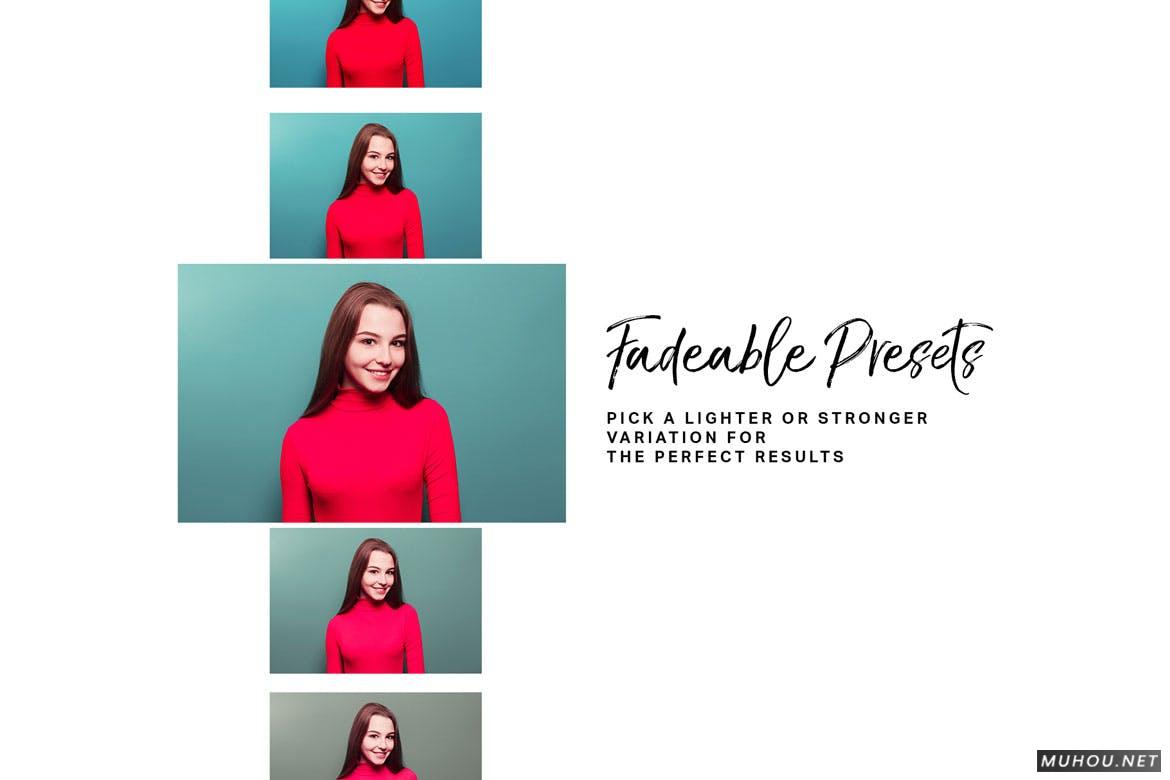
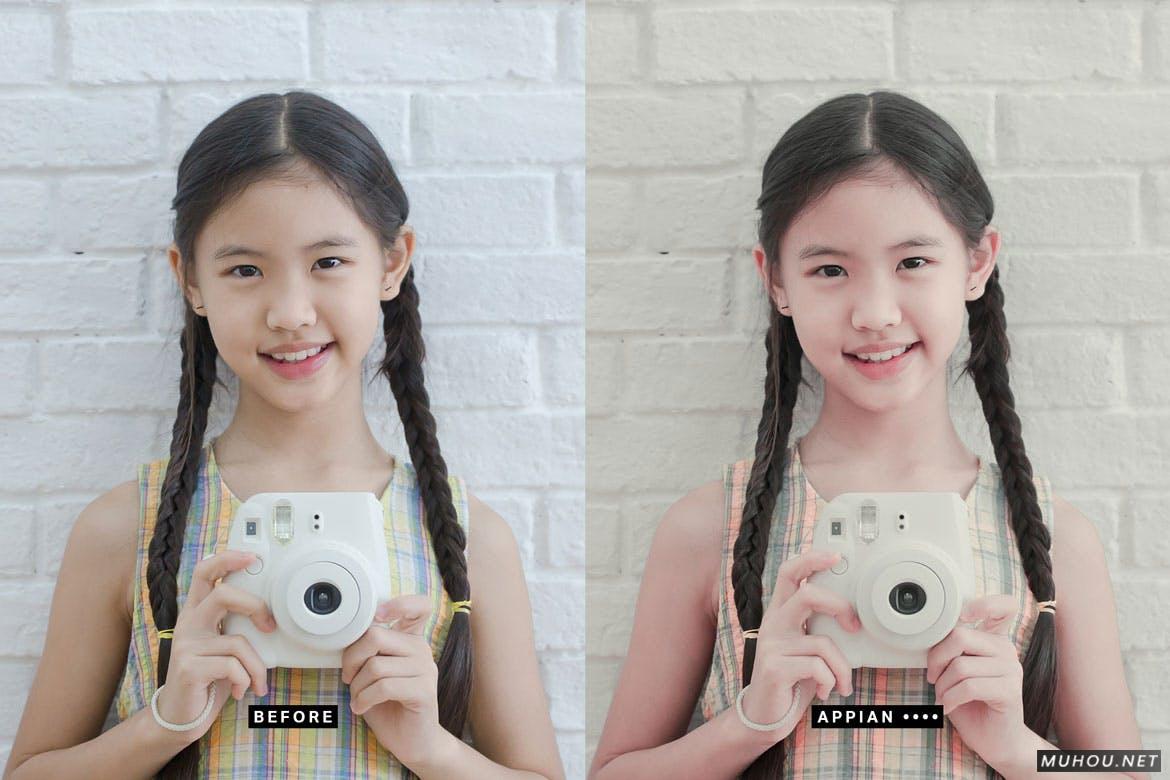
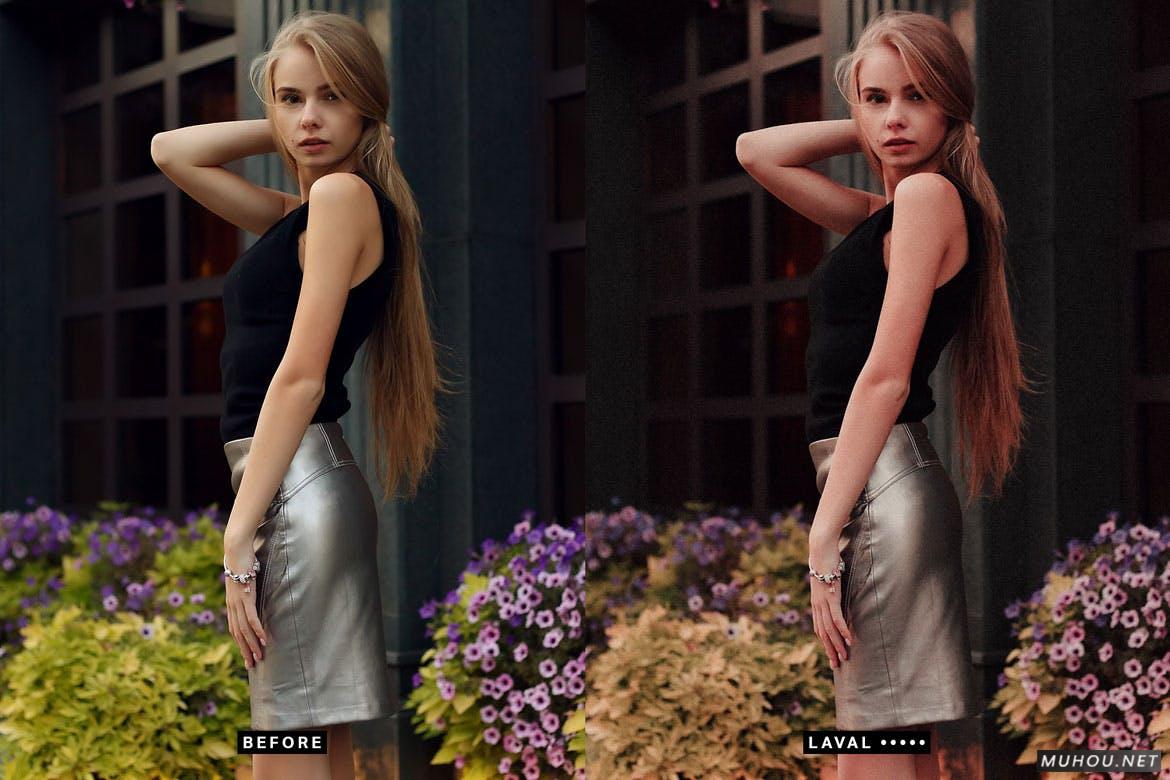
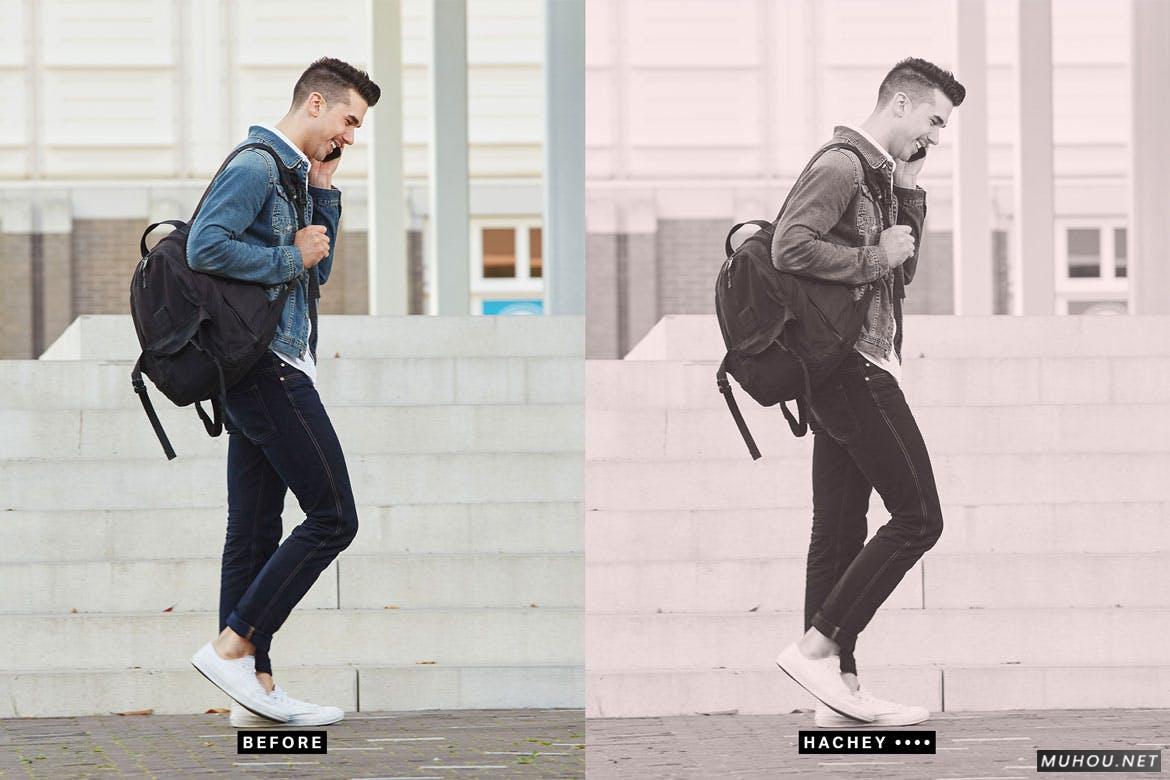
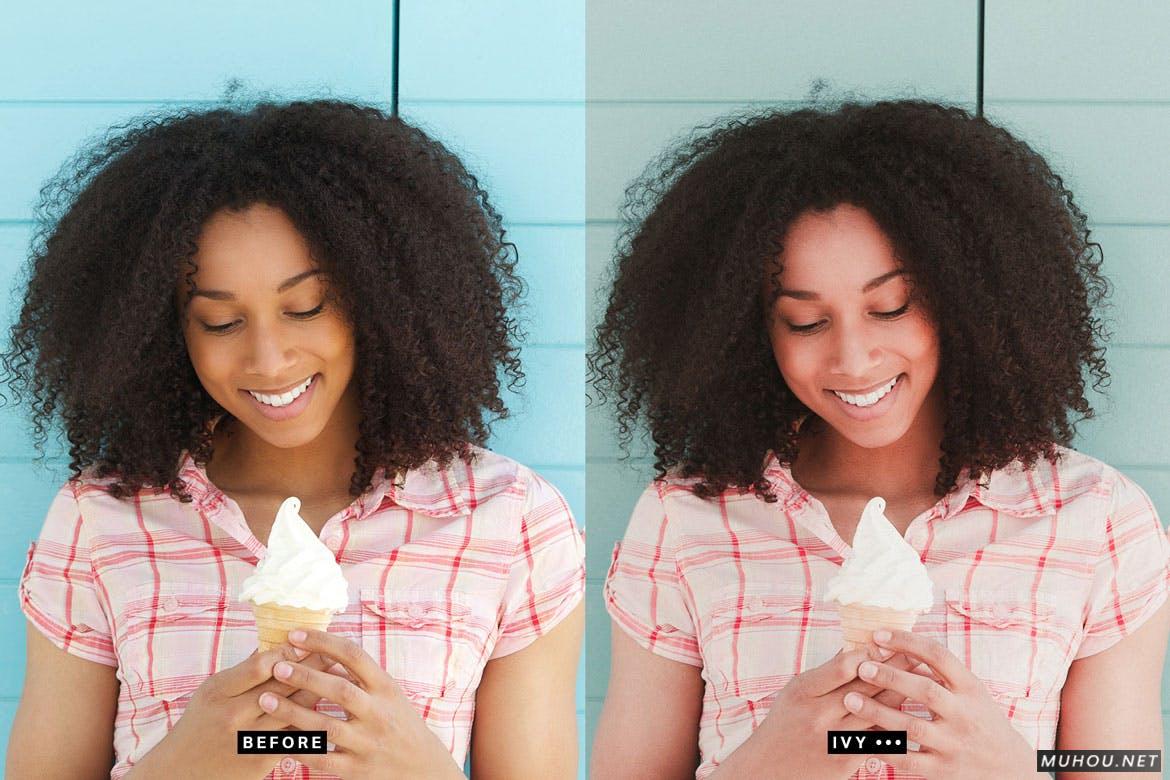
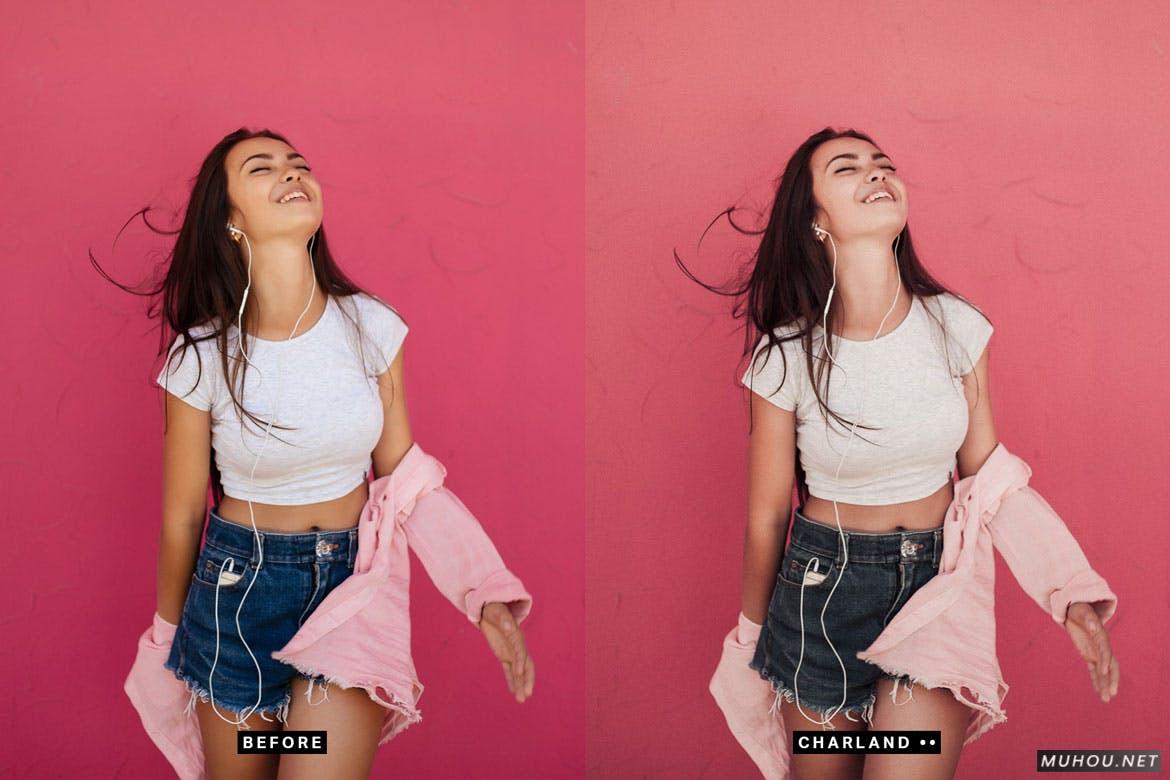
通过这组14个Lightroom预设和LUT,为您的照片增添粉红色的外观。这些预设可通过柔和的柔和色调帮助您获得女性化的外观。可淡入淡出的预设意味着您可以选择更浅或更强的物体以获得完美外观。
你会得到什么
1 * 14个Lighroom预设(14个外观x 5个强度=总共70个预设)
14个快速渲染的LUT
14个高质量LUT
粉红Lightroom预设和LUT
✔14种粉红色外观
在14个美丽的粉红色预设之间进行选择。它们为您的照片提供柔和的粉红色色调,在人像中看起来很棒。
✔淡入淡出的Lightroom预设
选择更轻或更强的东西以获得完美外观。每个预设有5种变化,从轻到强。
✔包含LUT
每个Lightroom预设都有其匹配的LUT,这些LUT可在其他软件中使用,例如Photoshop,Premiere,After Effects,Affinity Photo,Final Cut Pro等。
✔轻巧快速
这些预设已针对性能进行了优化。通过迷你化设置数量,设置速度更快并且更易于编辑。最重要的是,您所做的所有白平衡和曝光修复都将保留-预设不会影响这些关键设置。
XML预设安装教程:
【AE调色预设安装】AE安装调用Luts调色预设教程
【PR调色预设安装】Premiere安装调用Luts预设步骤教程
【达芬奇预设安装】DaVinci Resolve调色Luts预设安装步骤
【FCPX预设安装】FCPX导入LUTS调色预设安装教程+插件
【PS调色预设安装】PS/ACR预设文件.xmp怎么导入Photoshop/Camera RAW+使用教程
【LR调色预设安装】LR预设如何导入Lightroom图文教程+视频(LR预设怎么用)
【LR调色预设安装】LR手机/平板.DNG预设如何导入Lightroom图文教程(苹果/安卓)
Add tastefully pink looks to your photos with this bundle of 14 Lightroom presets and LUTs. These presets help you achieve a feminine look with warm pastel tones. The fadeable presets mean that you can choose something lighter or stronger for the perfect look.
Download and try them out today!
What You’ll Get
1* 14 Fadeable Lighroom Presets (14 looks x 5 strengths = total of 70 presets)
- 14 Fast-Render LUTs
- 14 High Quality LUTs
Pink Lightroom Presets & LUTs
- Appian
- Bosworth
- Brookmere
4.Cameron - Charland
- Denton
- Hachey
- Hart
- Ivy
- Laval
- Leemax
- Seaforth
- Tipton
- Westview
✔ 14 Pink Looks
Choose between 14 beautiful pink presets. They give your photo the pastel pink tones that look great in portraits.
✔ Fadeable Lightroom Presets
Choose something lighter or stronger for the perfect look. Each preset comes in 5 variations from light to strong.
✔ LUTs Included
Every Lightroom preset come with their matching LUTs that can be used in other software such as Photoshop, Premiere, After Effects, Affinity Photo, Final Cut Pro and more.
✔ Lightweight and Fast
These presets have been optimized for performance. By minimizing the amount of settings, they much faster and it’s easier to edit. Best of all, any white balance and exposure fixes you made are preserved – the presets don’t touch those crucial settings.
✔ Fully Compatible with LR Toolkit
These presets can be modified and used in conjunction with LR Toolkit. LR Toolkit is the best workflow system for Lightroom and it makes it easy for you to customize the presets. You can adjust the fade, create HDR looks, boost colors, and a lot more. More information can be found at www.lrtoolkit.com
How to Install Lightroom Presets
- In Lightroom, go to Edit Preferences (Lightroom Preferences on Macs).
- Go to the Presets tab then click the “Show Lightroom Presets Folder” button.
- Copy the “SparkleStock Pink ” folder into your Lightroom Develop Presets folder.
- Restart Lightroom. The presets will appear in the Presets panel located in the Develop module.
How to Use LUTs in Photoshop CC
- Go to Layer New Adjustment Layer Color Lookup.
- Click on the 3DLUT file dropdown menu then select “Load 3D LUT…”.
- Browse for the *.CUBE file then click Load.
Notes:
- LUTs can only emulate the color grading. There may be slight differences in the results.
- The Fast-Render LUTs are recommended for video projects. They process faster with minimal difference compared to the HQ LUTs.
Works With:
- Lightroom CC (All Versions)
- Lightroom Classic CC (All Versions)
- All software that supports LUTs (including Photoshop CC, Affinity Photo, Adobe Premiere CC, Adobe After Effects CC, etc.)
Mac and Windows
